Note: All information is based upon Windows operating system and Lightroom 2.3
The filmstrip at at the bottom of the Lightroom workspace provides a great deal of functionality that may not be apparent at first look. It is much more than just a quick thumbnail view of you photos. This article will give a full working knowledge and show you the hidden potential of the filmstrip.
The filmstrip is also one of very few items that are consistent across all of the modules in Lightroom.
Parts of the Filmstrip
Control Bar
The black control bar above the filmstrip lets you control most of what the filmstrip is doing.
Taking a closer look at the left side of the control bar we will see the following, from left to right.
Dual Monitor
On the very left you will see two icons numbered 1 and 2, these are for activating dual monitor support in lightroom. Even if you do not have two monitors you can still use this to open a second lightroom window which can show a different lightroom view than the first. (Ctrl+shift+F11 toggles the secondary display between full screen and windowed views)
Grid View
The next icon which looks like 4 squares will automatically return you to the library module grid view on your primary monitor.
Forward and Back arrows – The forward and back arrows let you change between the current and previous lightroom views. This could be changing folders or collections, or changing from library to develop or other modules.
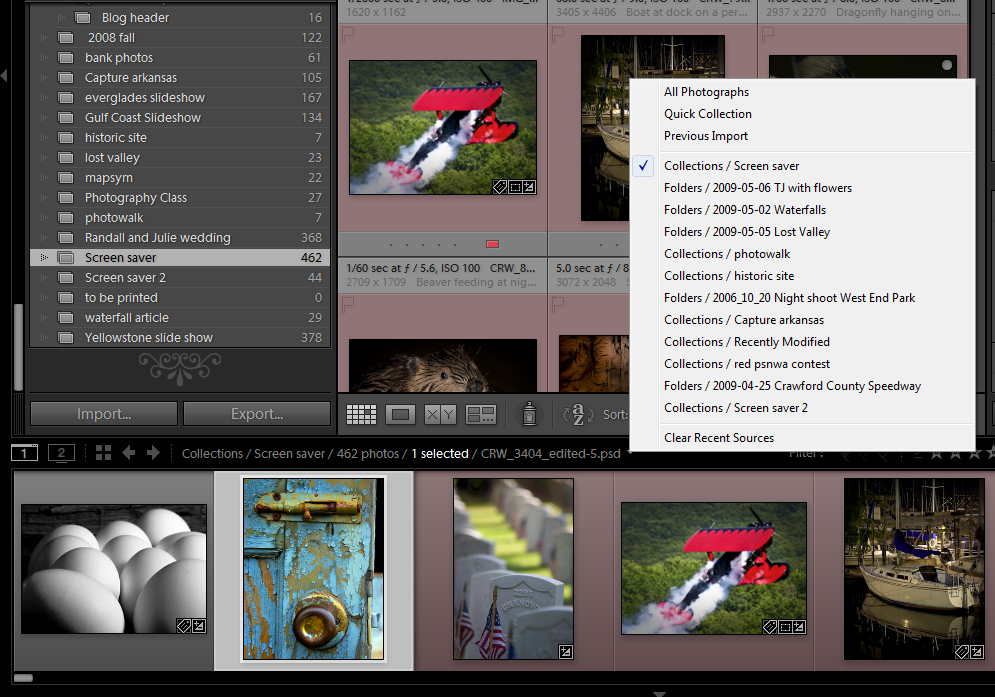
Filmstrip Information – This displays the Catalog, Collection, or Folder currently displayed in the Lightroom Filmstrip. It also displays the number of photos being held in the Filmstrip, and whether or not any of them are selected. The final part of this information line displays a file name of the most recently selected photo. By clicking on the down arrow at the end of the file name you will get a history of the recently used folders and collections and can click on any of them to quickly return to that location.
Filter Information
The right side of the control bar contains the filter controls for what is being seen in the filmstrip and grid views (as selected with the tools in the library window used to flag, rate, and label photos). You can filter on one or more of the “flag”, “rating”, or “label” by clicking on the value you wish to use. By using the drop down box to the right you can save you settings for future use as a preset. The last icon will turn the filter on and off.
Thumbnails
Below the control bar is the actual film strip with the thumbnails of your photos. There is a number of icons representing different information that will appear on the image itself.
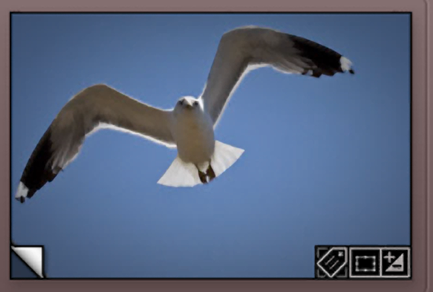
Virtual Copy Indicator
On the picture of the seagull you will see two of the same shot, however the second has the bottom left corner bent up, this indicates that this is a virtual copy and not the original image.
Quick Collection Indicator
On the last image in the filmstrip above you can see a small circle filled with medium gray in the top right-hand corner of the image, this indicates that the image is in the quick collection. When you mouse over the image the circle will appear on the image in light gray and by clicking will add it to the quick collection, if you click a dark graycircle it will remove it from the quick collection.
Badges
In the image below you can see three icons in the lower-right corner, these are “badges” and indicate in order left to right:
The image has one or more keywords.
The image has been cropped.
The image has has adjustments made in develop.
By clicking on the badge it will open the image in the module related to the badge.
Stacking
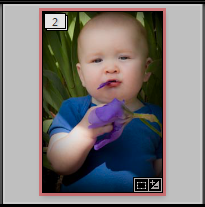
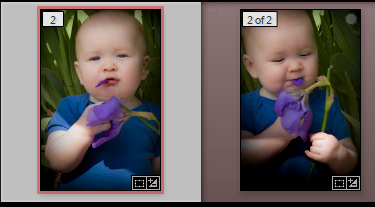
The image below shows the icon for photo stacks in lightroom, it will show the number of photos in the stack. When you click on the icon it will toggle between expanding and collapsing the stack.
Photo Matte
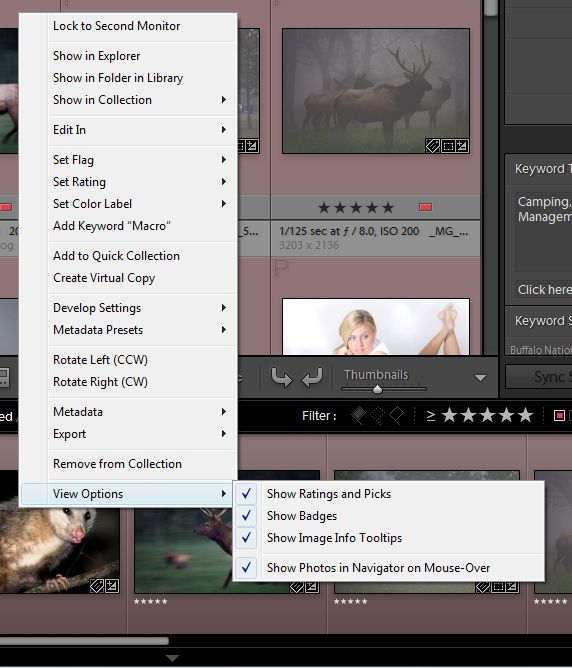
The matte around the image can give us additional information, by default most of this is turned off. Right click on the filmstrip to get the following menu.
Click on “View Options” and if a check mark is not beside any of the options click the option and it will toggle on, repeat for additional options until all are turned on.
Ratings
The “Rating” (stars) will appear in the lower left of the matte as 1 – 5 stars as seen on the image above.
Labels (Colors)
The labels that you select will show by changing the color of the matte to match your selection, when selected the color will show as a small line on the inside of the matte.
Picks (Flags)
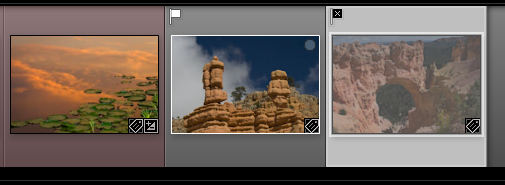
The flags that you apply will show in the top left of the matte. An unselected will show nothing, a “Pick” will show a white flag and a reject will show a black flag with an X. A rejected image will also show as a faded image in the filmstrip.
Selecting Images
The active selected image will have a white matte, any additional selected images will have a light gray matte, and unselected images will have either a dark gray or a colored matte to match the label.
To select a single image in the filmstrip simply click on the image and it will become the selected image. To select additional images hold the “Ctrl” key and click the additional images. To select a continuous range of images click the first, hold the “Shift” key and click the last. You can click any selected image to change the Active image without losing the rest of your selections. To remove the selection from all images press “Ctrl + d” .
Customizing the Filmstrip
There are a number of things you can do to customize the appearance of the filmstrip. You can change the size of the thumbnails by hovering the mouse between the top of the control bar and the bottom of the library window until your cursor turns to a double headed arrow, then click and drag up or down to make the images larger or smaller. If the thumbnails become to small you will not see all of the information listed above.
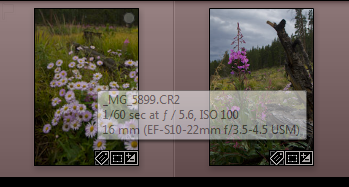
Show image info tool tips
If you turned on the show image info tool tips as shown earlier, you may not have seen anything change. To see the information hoover the cursor over an image in the filmstrip and a box will appear with information about the photo.
Scrolling Photos in the Filmstrip
There are several ways of scrolling through the filmstrip.
The slider bar at the bottom of the filmstrip, click and drag.
The small arrows at either end of the filmstrip, click and hold to scroll, let off to stop.
Hoover the cursor over the line between photos at the top of the filmstrip, when the cursor turns to a hand, drag the filmstrip to the left or right.
Use the left or right arrow keys on the keyboard.
Sorting Photos in the Filmstrip
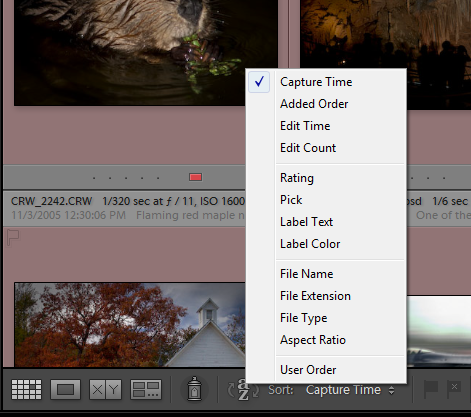
This is a function of the filmstrip that you have to set in the Library Module. In the tool bar at the bottom of the library module you should see a sort option with a double headed arrow for a drop down list. You then click on the parameter that wish to have the photos sorted by (if you do not see this option click the down arrow on the far right of the library window and you will get a drop down box to toggle on and off what tools are showing). You can also use the menu bar at the top and choose “View” – “Sort”.
Rearrange Photos in the Filmstrip
You may have noticed that the last item in the sort order is “User Order”, to manually arrange the photos click and drag on an image (not the matte) and move it to the location you want. Lightroom will remember this each time you choose “User Order”. This can be very useful for sideshows, picture packages, and web galleries.
Show or Hide
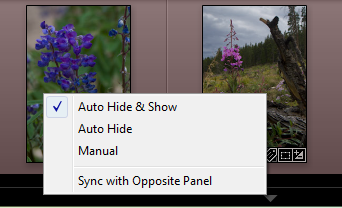
You can show/hide the filmstrip by clicking on the down arrow at the bottom of the filmstrip.
If you right click on the down arrow icon you will get the above menu which will give more control over the action of the show/hide function.
I hope that this rather long post is helpful in understanding everything that is going on in the filmstrip, if you find the information helpful please let me know. If you find any mistakes or omissions let me know that as well.


