Photograph Star Trails Even in Full Moonlight
This article will teach you how to use a digital camera to capture beautiful star trail images at night.
Contents:
What are Star Trails?
Equipment Needed
Composition
Single Exposure Star Trails
Image Stacking Star Trails
We are now in the fall, one of my favorite times of the year for photography. I enjoy doing night photography at this time of year the as nights are beginning to cool off and it is getting dark earlier so you don’t have to stay up as late. Photographing star trails was a very hit and miss process with film, and required perfect conditions, with an unexpected car driving thru ruining your photo. If your exposure was too long any light source would overexposure the scene again ruining the photo. In the early days of digital many cameras were not able to shoot for a long enough period of time to capture nice star trails, and the digital noise was a major issue. With todays modern digital cameras and computer software it is now easy to capture great star trail photos under many conditions it was previously not possible.
What are “star trails”?
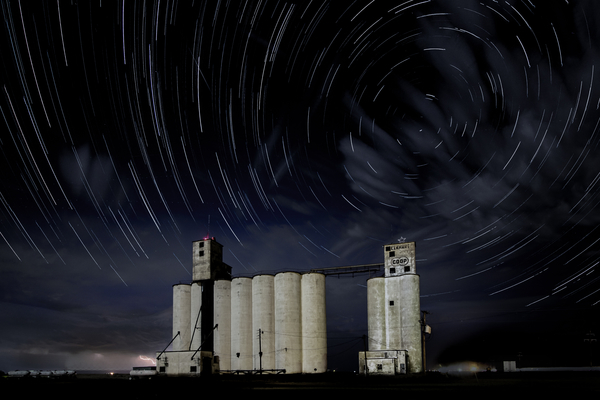
As the Earth rotates on its axis the stars appear to move across the sky, this is something that we cannot see with the naked eye, but if look where a certain star or constellation is in the night sky, and the look again in a couple of hours we will see that they have moved. By using a camera to take a long exposure up to several hours we can capture the movement as streaks of light in the sky.
Equipment Needed
- Tripod – A really good steady tripod is essential. It is also very important to properly set up your tripod making sure all adjustment are good and tight and will not creep during the very long exposure times needed for star trail photography.
- Digital Camera – Any digital camera that you can set manually and trigger with a locking remote will work.
- Wide angle lens – This is not a must, but is my own recommendation, you may actually prefer results with a different lens, or if you don’t have a wide-angle, don’t let that stop you from enjoying star trail photography.
- Cable Release – or other method of activating the shutter continuously without touching the camera. (I have heard of people using a rubber band and a sewing button on the camera shutter button to accomplish this.)
- Folding Lawn Chair – you are going to be out there for a long time you might as well be comfortable, most rocks get very hard after an hour.
- Flashlights – I recommend carrying at least two flashlights. I use a large normal flashlight to be able to “Light Paint” if I desire and a LED headlight that I use to find my way around and adjust my camera without having to hold onto a flashlight.
- Fully charged battery – most new cameras have very good battery life, but be sure it is fully charged. Shooting for over an hour continuously is a big drain on the battery. In cold conditions the battery may tend to simply quit working even without being drained. The use of pocket hand-warmers secured to the outside of the camera with an ace bandage will help keep them functioning.
- Compass – used to help find the North Star.
Composition
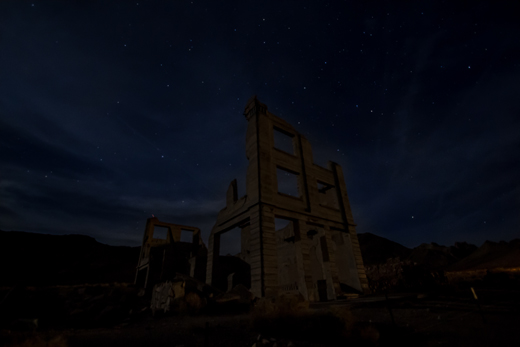
Composing your image whether shooting star trails or anything else is one of the most important parts of making a great image. The key to great star trail images is to have a great image without the star trails. Find an area with something interesting for the foreground, and be sure that there are not any lights or other distractions in the image. A wide-angle lens, the wider the better, will allow you to capture more of the sky and therefore more stars. This may be obvious, but I am going to mention it anyway, you must be able to see the stars. If there is very much cloud cover, trees or other obstructions, or anything blocking the view of the stars you will not be able to photograph them. Be sure that the moon is not in the frame, or that it will not move into the frame during the duration of the shoot.
I like to try to find a location and plan my composition during the daylight, this also helps me to know where any potential hazards may be.
A tool that I find very useful is TPE (The Photographers Ephemeris), this is a software program for either a computer or a smartphone that works with Google Maps to show your position and then overlays lines showing where the sun and moon will rise and set. The software is free for PC and less than $10 for IOS or Android phones and tablets. You need to be connected to the internet to use TPE. The software for PC can be downloaded here http://photoephemeris.com/, and the IOS from the Apple App Store, and for Android for the Android Market Place.
Test Shots
Due some test shots to check the composition, don’t worry about getting exposure correct, set a very high ISO, take a quick shot and look at things like focus, framing, objects in the foreground and background, is the horizon level, is the composition just the way you want it.
If you have any light in the area you may have enough to expose the foreground object to your liking. If it is very dark the foreground may be only a silhouette, which may be fine, but if you want some detail in it you will need to do some “light painting”. “Light painting” is an easy process of simply shining a flashlight on the areas you want illuminated in the finished photo. The technique is not difficult, but does take some practice with the key being, not to hold the light still in one place. The good news is that when stacking images you only need one with the proper light painting.
Streaks or Circles
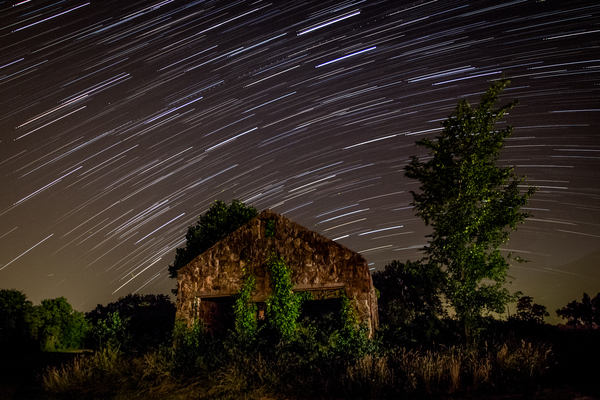
Depending on the direction you shoot and the focal length of the lens, you can either have curved streaks across the sky or full circles around a central point.
If you want circles you must have the North Star in the photo (assuming you are in the northern hemisphere), and if you only want streaks you need to avoid having the North Star in the photo.
The North Star
How to Find the North Star
How long of Exposure Do You Need?
This is of course dependent upon the look that you like, the longer the exposure time the longer the star trails.
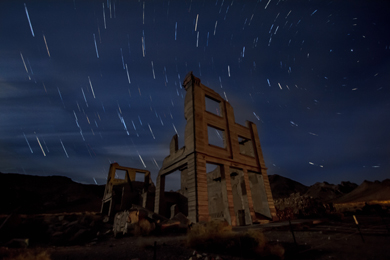
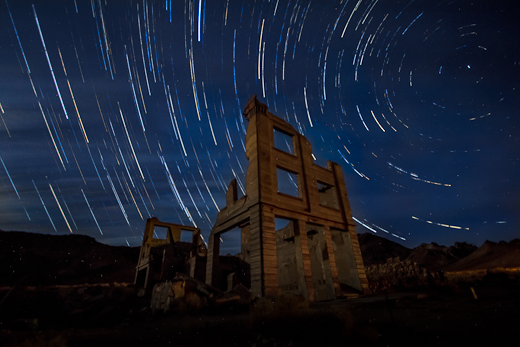
40 minutes of exposure, made from 160 stacked images.
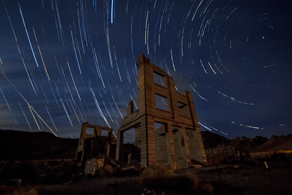
65 minutes of exposure, made from 258 stacked images.
Single Exposure Star Trails
The original way, the only way with film to capture star trails is to lock the shutter open in bulb mode and leave it open for the duration of the capture time.
Advantages of single exposure star trails:
With a single exposure you shoot only 1 exposure and have very little post processing work to do.
Disadvantages of single exposure star trails:
Image Stacking Star Trails
Advantages of image stacking:
Disadvantages of image stacking:
Capturing the images:
Exposure
Shoot with RAW file format, this is very important for night photography, not only will you have better ability to eliminate noise, you can adjust the white balance with great accuracy in post processing. Set your camera to shoot in full manual, including focus. Turn off image stabilization if your lens has it, as it could cause movement by shifting the lens elements and it will cause additional drain on the battery.
Setting the exposure is a bit tricky, but simply requires doing test shots. Most cameras will shoot up to 30 seconds with the built-in shutter timer, and I usually try to keep my shutter speed near that to keep down the number of shots required. and be able to use a lower ISO setting. In order for the stars to show, you will need to shoot with your aperture nearly wide open. Your goal is to get a nice exposure of the foreground item and some background detail while still keeping the sky dark and the stars showing as tiny points of light in the sky. If you are shooting with the moon or other nearby light sources, this is fairly easy to do. If it is really dark you may want to do some light painting on the foreground subject to bring out detail, but keep in mind this will only need to be done for one image. Once the exposure is determined you simply set the camera to continuous shooting and lock the cable release to make the camera take another exposure as soon as the previous one is finished. Now just sit back and enjoy the night, for however long you want the final image to be exposed. I find that 45 to 90 minutes works very nice.
Capture Dark Frames
Digital camera sensors will have hot pixels or off-color pixels, especially after long periods of use. immediately after completing the sequence place the lens cap on the lens and shoot a few more shots with the same settings. The stacking software will then eliminate any pixels that are not black from the finished image.
The Process of Image Stacking:
In order to stack images you will need computer software capable of doing the process. I have listed several programs below for your convenience only, I have not used all of these, and am not making any endorsements or recommendations.
Image Stacking Software
Prepare for Stacking
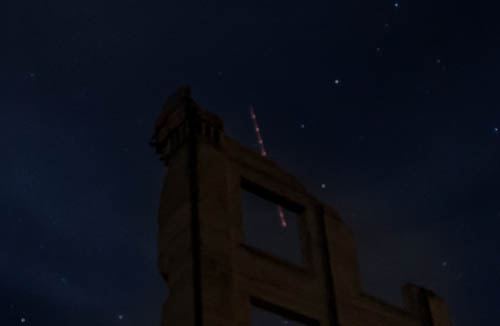
In the image below I have edited out the aircraft by simply painting with black over it. I do not have to be precise because the stacking software will use pixels from another image to replace all of the black pixels.
Stacking the Images
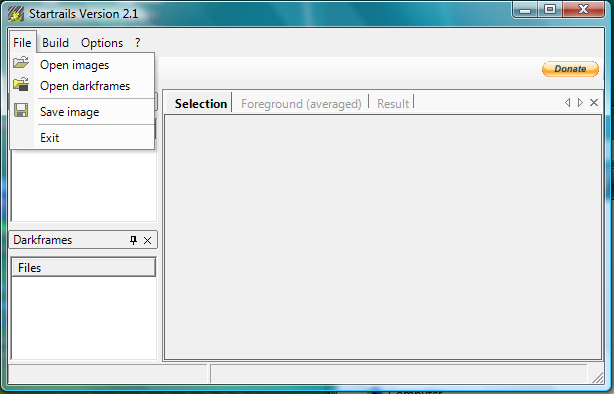
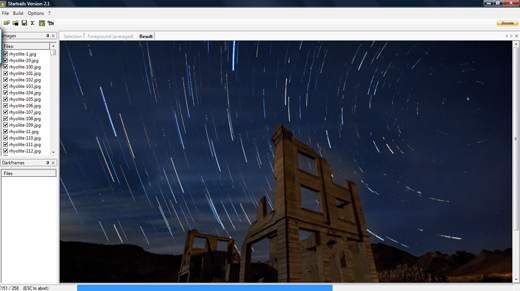
This is actually the easy part of the process, the software will do all the work, however it may take a while for it to complete. Open Startrails.exe, select file and choose Open Images, then browse to the folder that contains the images you have prepared for the stacking and select one image, press “control-a” to select all images in the folder, then click the open button.
Repeat the process to open the “dark frames” choosing Open darkframes.
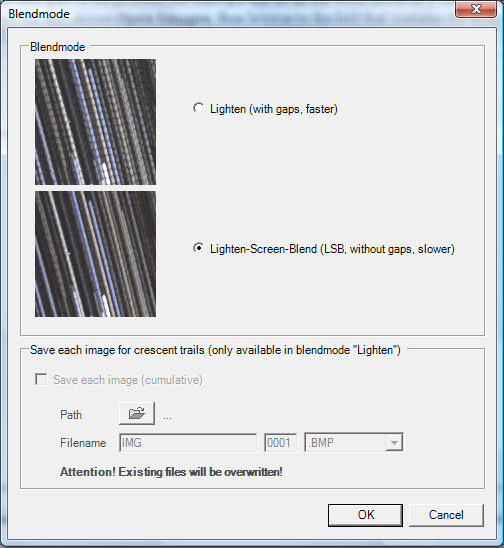
When the images are loaded select the “Build” menu and choose”Startrails”. You will then get a new window to choose the Blend Mode. I recommend the Lighten-screen-blend for smother lines.
The software will then begin combining the images, showing the progress as it works. You can watch as the Star Trails grow with each image being added.
Final Post Processing
After the stacking process is complete I then bring the image back into lightroom and make final adjustments, and Photoshop if necessary. The resulting image will be brighter than the ones you edited earlier and I usually increase the black level again.
